Project import/export
- Introduced in GitLab 8.9.
- From GitLab 10.0, administrators can disable the project export option on the GitLab instance.
Existing projects running on any GitLab instance or GitLab.com can be exported with all their related data and be moved into a new GitLab instance.
The GitLab import/export button is displayed if the project import option is enabled.
See also:
- Project import/export API
- Project import/export administration Rake tasks (CORE ONLY)
- Group import/export
- Group import/export API
To set up a project import/export:
- Navigate to {admin} Admin Area > {settings} Settings > Visibility and access controls.
- Scroll to Import sources
- Enable desired Import sources
Important notes
Note the following:
- Imports from a newer version of GitLab are not supported. The Importing GitLab version must be greater than or equal to the Exporting GitLab version.
- Imports will fail unless the import and export GitLab instances are compatible as described in the Version history.
- Exports are stored in a temporary shared directory and are deleted every 24 hours by a specific worker.
- Group members are exported as project members, as long as the user has maintainer or admin access to the group where the exported project lives.
- Project members with owner access will be imported as maintainers.
- Using an admin account to import will map users by email address (self-managed only). Otherwise, a supplementary comment is left to mention that the original author and the MRs, notes, or issues will be owned by the importer.
- If an imported project contains merge requests originating from forks, then new branches associated with such merge requests will be created within a project during the import/export. Thus, the number of branches in the exported project could be bigger than in the original project.
Version history
Starting with GitLab 13.0, GitLab can import bundles that were exported from a different GitLab deployment. This ability is limited to two previous GitLab minor releases, which is similar to our process for Security Releases.
For example:
| Current version | Can import bundles exported from |
|---|---|
| 13.0 | 13.0, 12.10, 12.9 |
| 13.1 | 13.1, 13.0, 12.10 |
12.x
Prior to 13.0 this was a defined compatibility table:
| Exporting GitLab version | Importing GitLab version |
|---|---|
| 11.7 to 13.0 | 11.7 to 13.0 |
| 11.1 to 11.6 | 11.1 to 11.6 |
| 10.8 to 11.0 | 10.8 to 11.0 |
| 10.4 to 10.7 | 10.4 to 10.7 |
| 10.3 | 10.3 |
| 10.0 to 10.2 | 10.0 to 10.2 |
| 9.4 to 9.6 | 9.4 to 9.6 |
| 9.2 to 9.3 | 9.2 to 9.3 |
| 8.17 to 9.1 | 8.17 to 9.1 |
| 8.13 to 8.16 | 8.13 to 8.16 |
| 8.12 | 8.12 |
| 8.10.3 to 8.11 | 8.10.3 to 8.11 |
| 8.10.0 to 8.10.2 | 8.10.0 to 8.10.2 |
| 8.9.5 to 8.9.11 | 8.9.5 to 8.9.11 |
| 8.9.0 to 8.9.4 | 8.9.0 to 8.9.4 |
Projects can be exported and imported only between versions of GitLab with matching Import/Export versions.
For example, 8.10.3 and 8.11 have the same Import/Export version (0.1.3) and the exports between them will be compatible.
Between CE and EE
You can export projects from the Community Edition to the Enterprise Edition and vice versa. This assumes version history requirements are met.
If you're exporting a project from the Enterprise Edition to the Community Edition, you may lose data that is retained only in the Enterprise Edition. For more information, see downgrading from EE to CE.
Exported contents
The following items will be exported:
- Project and wiki repositories
- Project uploads
- Project configuration, including services
- Issues with comments, merge requests with diffs and comments, labels, milestones, snippets, time tracking, and other project entities
- Design Management files and data
- LFS objects
- Issue boards
- Pipelines history
The following items will NOT be exported:
- Build traces and artifacts
- Container registry images
- CI variables
- Webhooks
- Any encrypted tokens
- Merge Request Approvers
- Push Rules
- Awards
NOTE: Note:
For more details on the specific data persisted in a project export, see the
import_export.yml file.
Exporting a project and its data
-
Go to your project's homepage.
-
Click {settings} Settings in the sidebar.
-
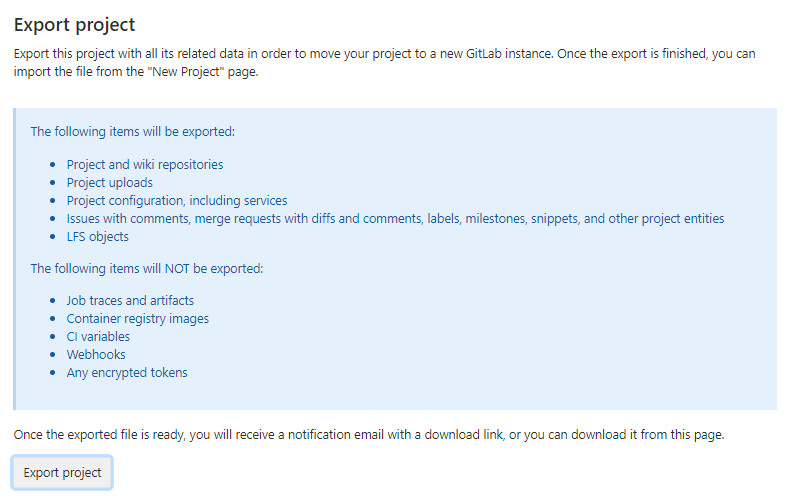
Scroll down to find the Export project button:
-
Once the export is generated, you should receive an e-mail with a link to download the file:
-
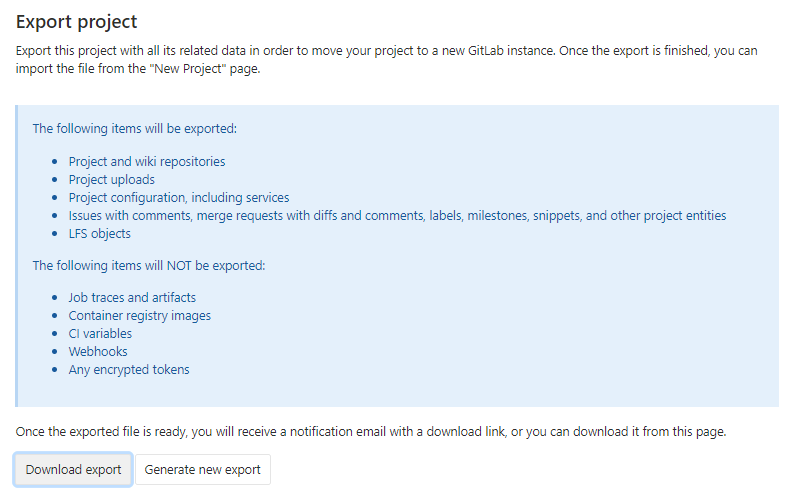
Alternatively, you can come back to the project settings and download the file from there, or generate a new export. Once the file is available, the page should show the Download export button:
Importing the project
-
The GitLab project import feature is the first import option when creating a new project. Click on GitLab export:
-
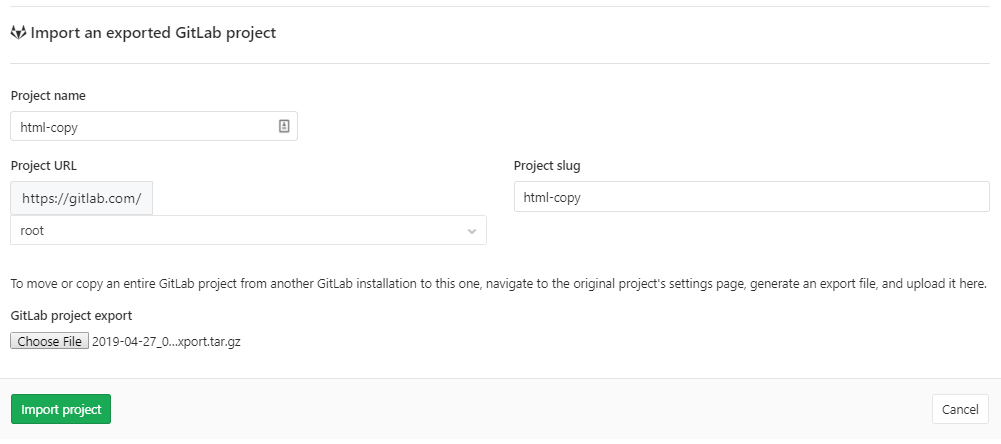
Enter your project name and URL. Then select the file you exported previously:
-
Click on Import project to begin importing. Your newly imported project page will appear soon.
NOTE: Note:
If use of the Internal visibility level
is restricted,
all imported projects are given the visibility of Private.
Rate limits
To help avoid abuse, users are rate limited to:
| Request Type | Limit |
|---|---|
| Export | 1 project per 5 minutes |
| Download export | 10 projects per 10 minutes |
| Import | 30 projects per 5 minutes |


